This guide shows how to import hyperspectral images of different format into Breeze, optionally editing them before the full images are loaded and specifying import settings that control the image quality.
You import images using a three-step wizard in Breeze. Each step is described in the following sections:
-
Select one or more hyperspectral images to import. Breeze supports the many different formats listed in the next section.
-
Optionally preview and crop images to reduce the image size. You can also add more files to import or remove files.
-
Optionally replace references for files, and control other advanced aspects of the import.
Supported image file formats
|
File format |
Extensions |
|
Breeze xml file |
xml |
|
ENVI Files |
bil, bip, bsq, raw, img, bin, dat |
|
HySpex |
hyspex |
|
Matlab files |
mat |
|
HDF files |
h5, hdf |
|
Image files |
jpg, jpeg, wbmp, png, wbmp, bmp, pbm, pgm, ppm, pcx, tif, tiff, gif, bmp, jp2 |
|
SAC file |
sac |
|
HIPS File |
hips |
|
Telops file |
sc |
|
PAM files |
pam, pgm, ppm, pnm |
Selecting files to import
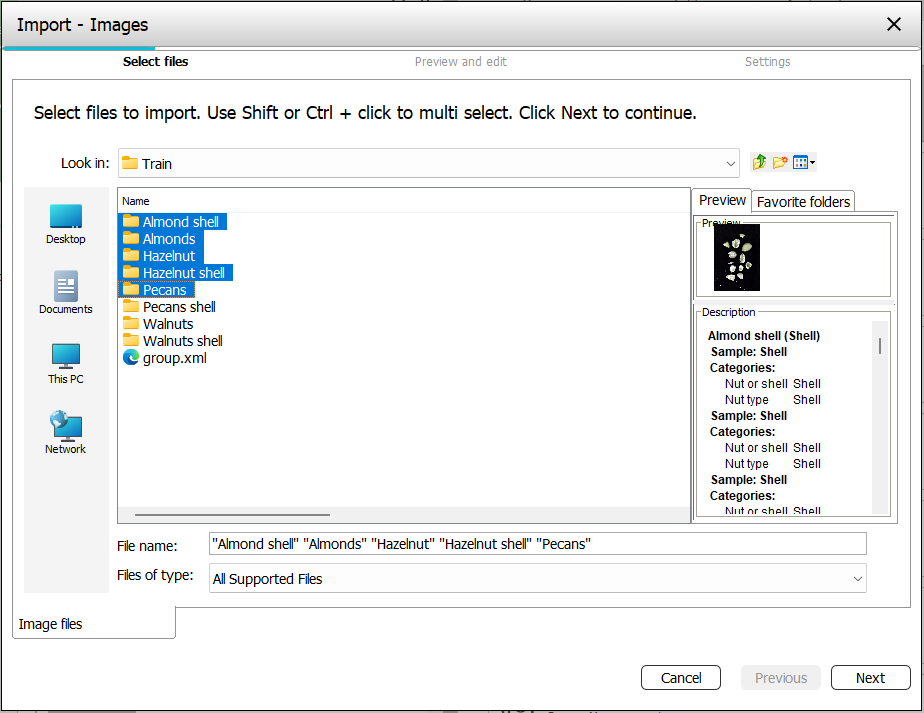
Select one or more files to import. Use Shift or Ctrl + click to multi select several files.
You can select measurement folders from Breeze (like in the below screenshot), or individual file types, such as .hyspex, or .raw.
Previewing and editing images before import
After you specified the files to import, metadata about the files are displayed in Breeze. Click on a row to load a preview of the image:

Below the preview, there are buttons for interacting with the selection:
-
Adding more files to the list, for import, or removing files from the list you no longer want to import
-
Duplicate a selected image (for example if you want to crop out different parts of the same original)
Next there are buttons to Load all preview images at the same time, and to configure the height of each row in the list.
Crop Image is useful if you if a small subset of the image contains what you are interested in. You can also use the Crop Image functionality to split an image into smaller grid cells. Each grid cell becomes its own measurement in Breeze. Crop image
Split selected vertically is used to split an image into a number of horisontal bands that each becomes a measurement in Breeze.
Cropping or reducing the size of images will make them quicker to analyze in Breeze.
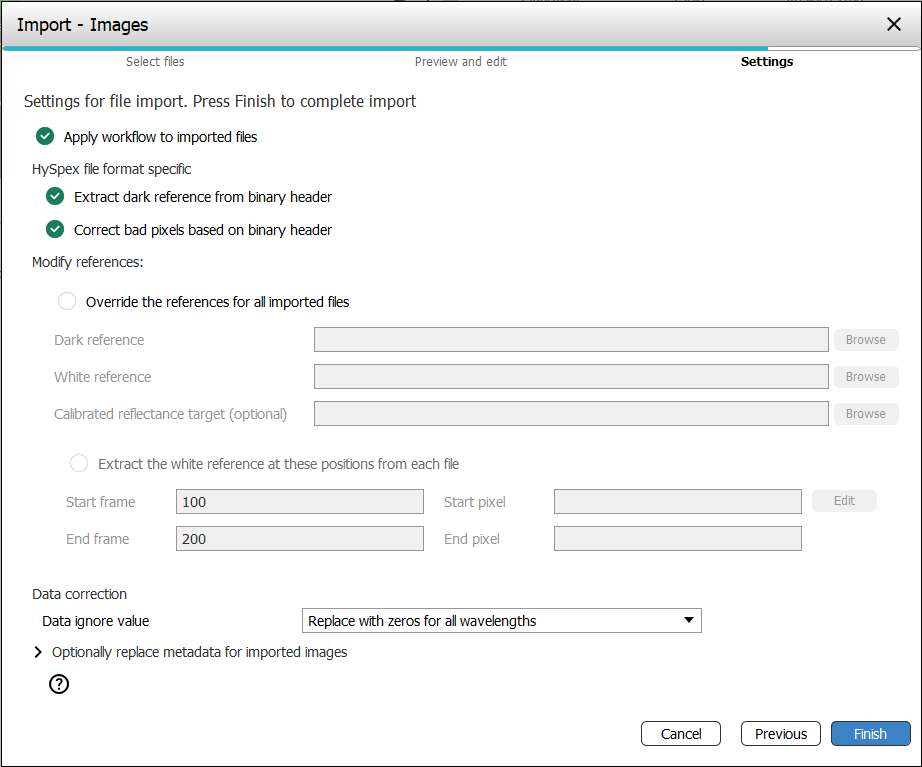
Settings for import
On the final Settings page of the import wizard, you can override default settings that control how data is imported, which dark and white references are used, and if the Analysis Tree workflow should be applied after the import is completed. The various settings are described below.
-
Apply workflow to imported files specified if the Analysis Tree should be applied to the imported files after the import is done. Tip: you can apply the workflow manually after import too.
HySpex file format specific options only show up if a file with the .HySpex extension has been selected:
-
Extract dark reference from binary header.
The dark reference will be extracted from the binary header of the HySpex files and used by Breeze. -
Correct bad pixels in image and references, based binary headers. Each HySpex file keeps track of bad pixels. This option corrects them at import, for the image, and dark and white references, if used.
If you import an image raw file from in a folder where there are also header files and dark- and white reference files, those will be detected and copied automatically to the imported measurement.
Modify references:
This can be used when you want to replace or modify the references at the same time you import them.
Note that you can replace references after import too, on the Measurement References tab.
-
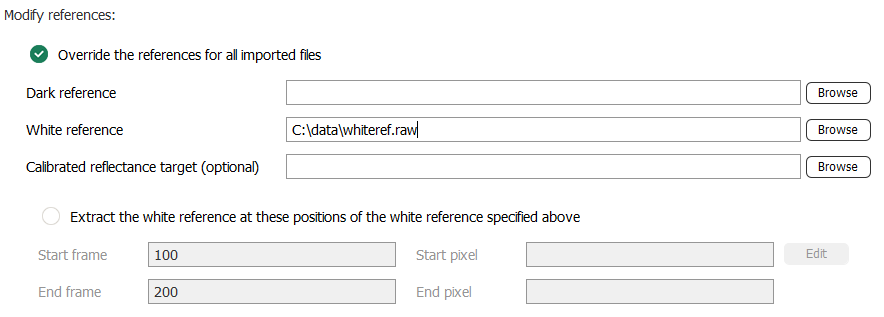
Override the references for all imported files
Specify the Dark reference and/or White reference to use for ALL imported files, overriding any existing dark or white references that the image may have. You can also replace the Calibrated reflectance target with the file. -
Extract white reference at these positions from each file
Set the positions where the white reference should be extracted from.
If you specified a particular white reference above to use for all images, the checkbox to extract the white references changes to Extract the white reference at these positions of the white reference specified above, so that you can use a subset of that file:
Optionally specify how the Data ignore value is handled. This value is defined in the image’s textual .hdr file and can signal to Breeze that a value is oversaturated and should not be used. The options are:
-
Ignore - import the values as is without changing it
-
Replace with zeros - replace the value with zero for the wavelengths it occurs
-
Replace with zeros for all wavelengths - replace all values for that pixel with zeros for all wavelengths
Optionally replace metadata for imported images:
The metadata can also be edited on the Metadata tab for each measurement after import. See Measurement Metadata.
-
Camera max signal
The camera maximum signal value. This will, for example, be used for white reference values for saturation. -
Field of view
The width of the image data files in millimeters. The field of view will be used to convert pixel values into millimeters for example for the size of identified objects. -
Integration time
Import scenarios
Here a few scenarios for image import are outlined. Refer to the detailed instructions above, when needed.
Scenario: Create a new project and import images to it
In the top-level of Breeze, without a project open, click Import images. Provide the name of the new project that will contain the images.
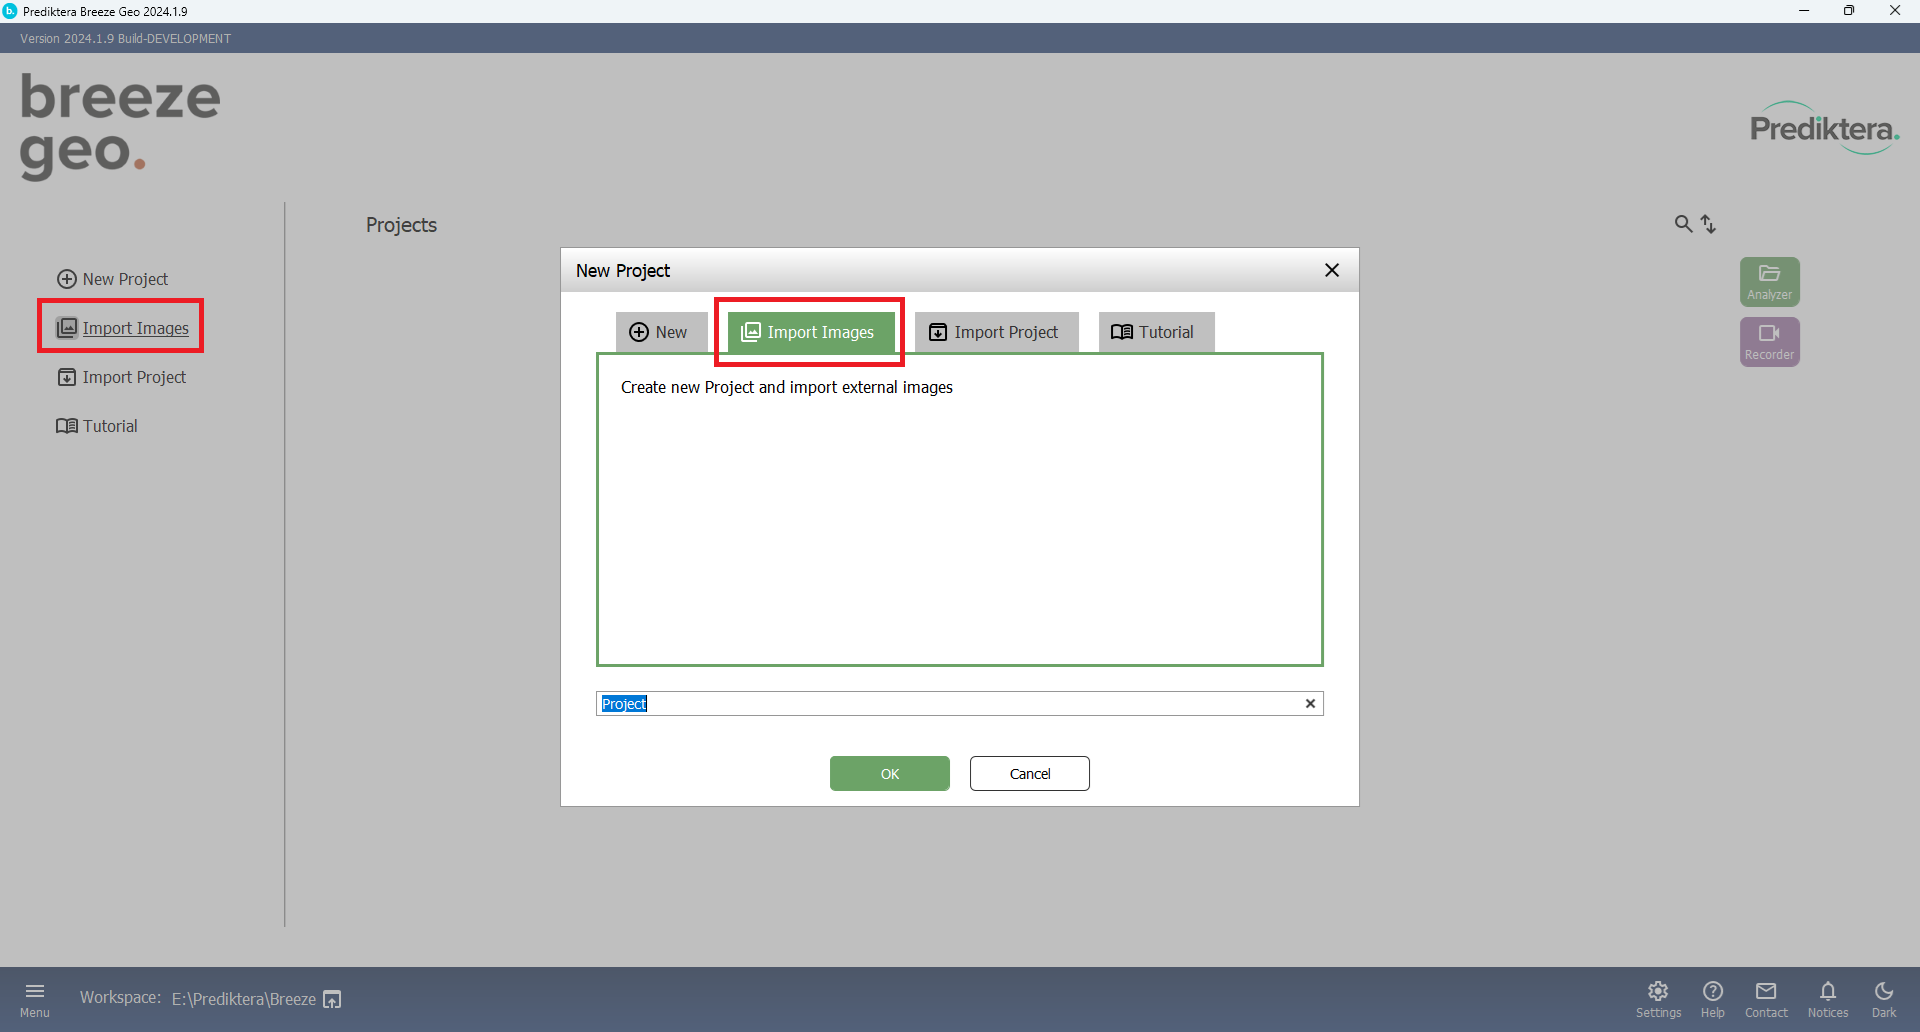
Click through the import wizard to select and import the data.
Scenario:Import into an existing project
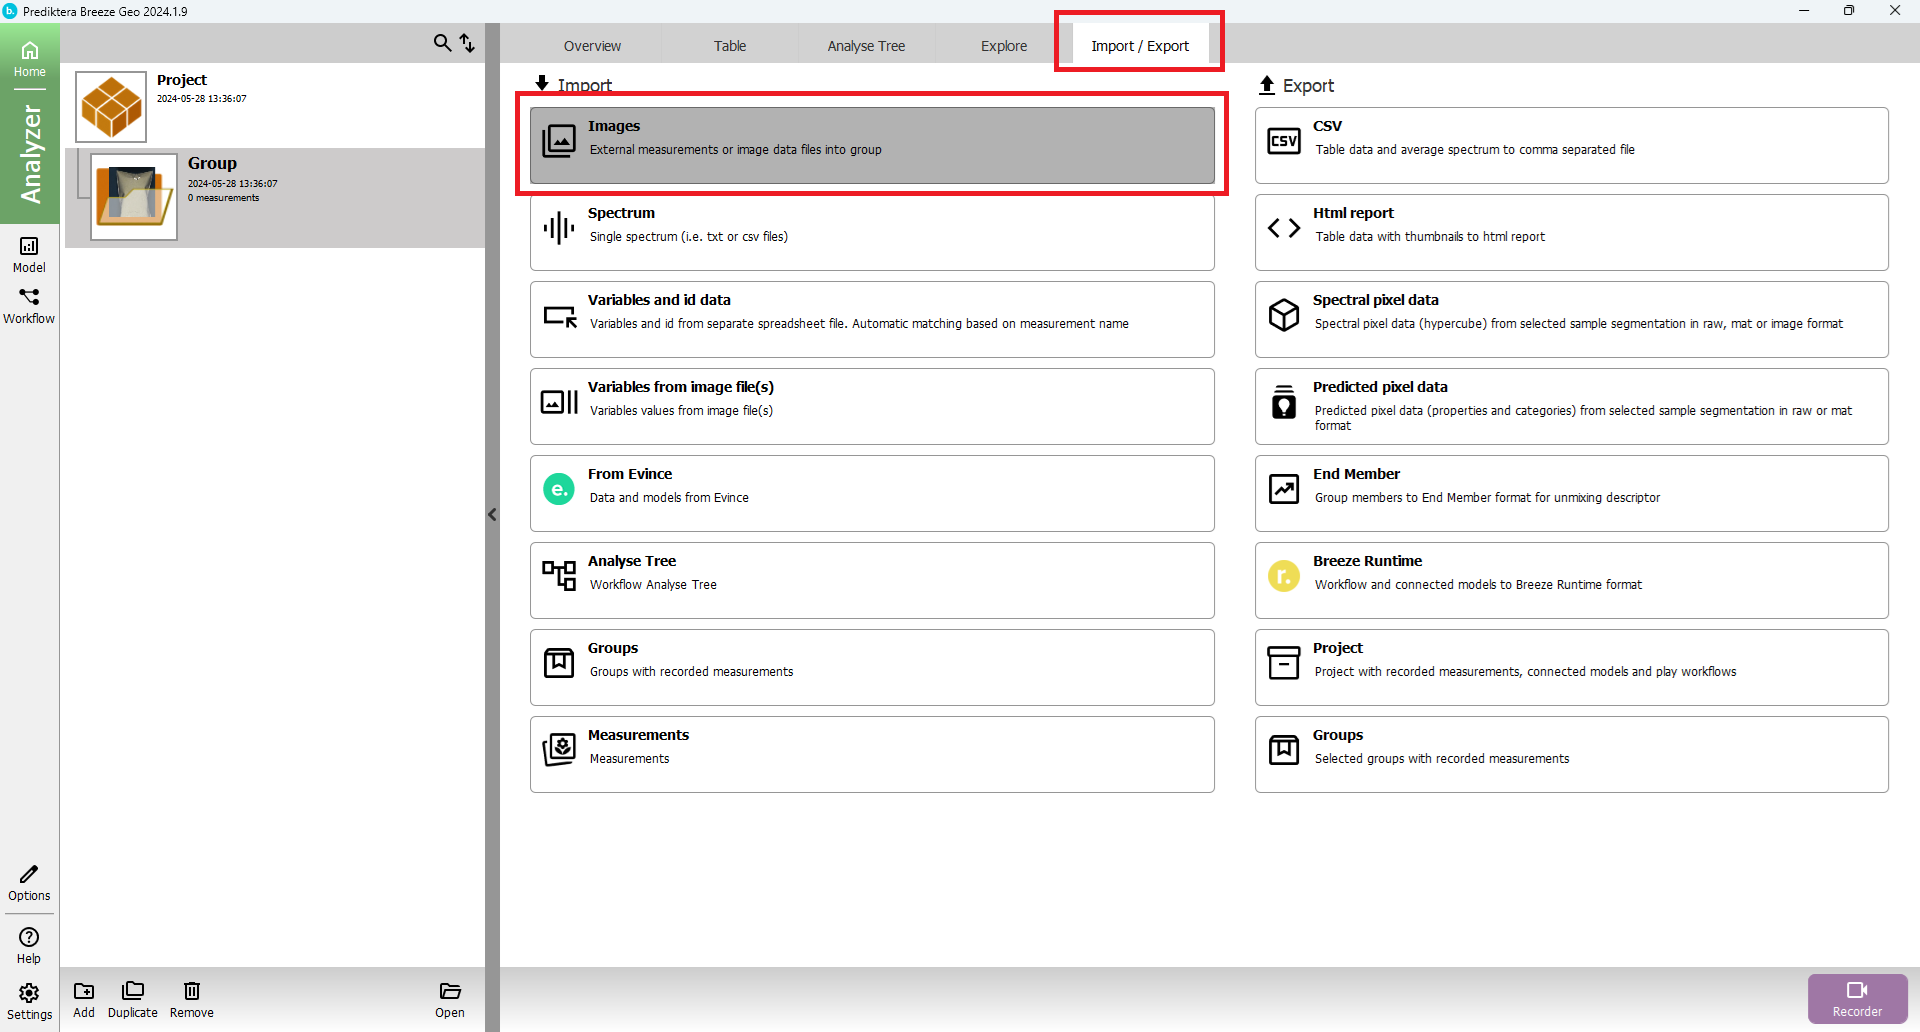
Images and data can also be imported into an open project by using the Import tab:
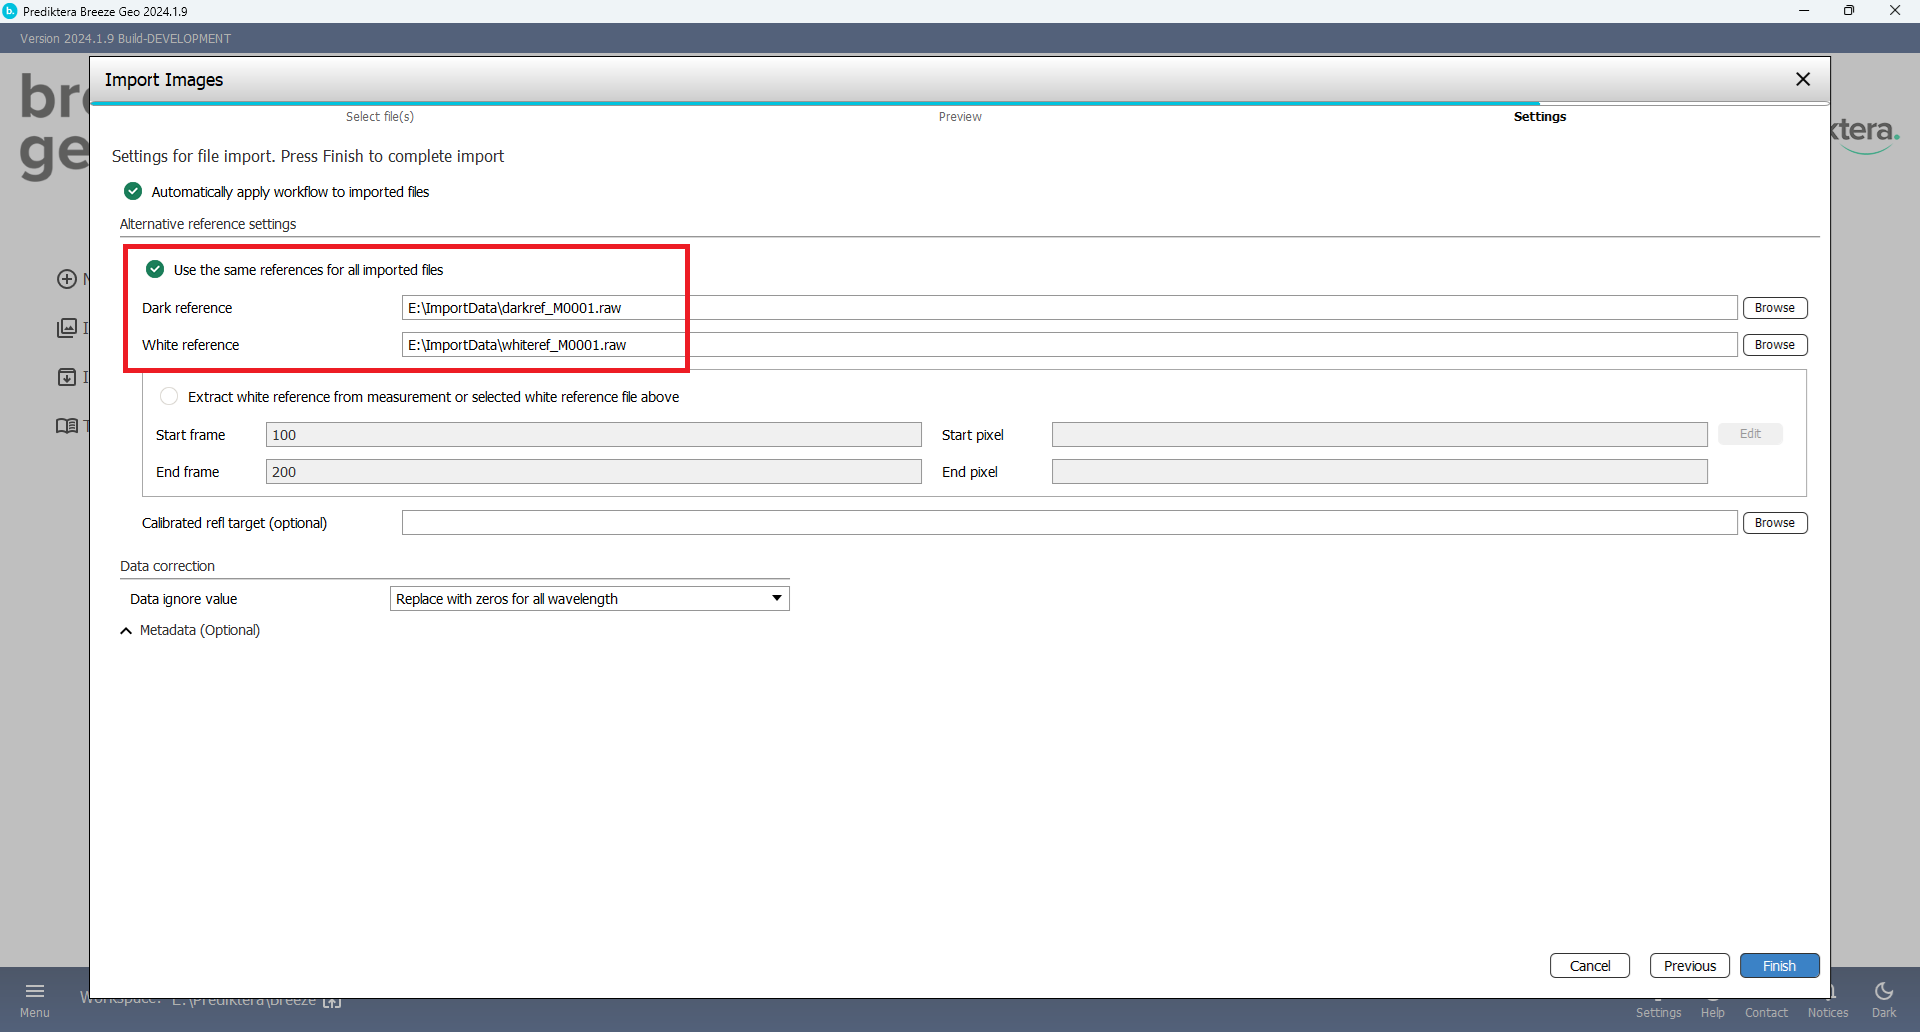
Scenario: import images and use the same dark and white reference files for all images
After specifying the files to import, you can select Use the same reference for all imported files to override the references used for all imported images.
Browse or enter the path for Dark reference and for White reference:
After import, view the references on the References tab.
Scenario: Importing of images that already have white and dark references
If the images are located in separate folders and the white and dark references for each image are located in each of these folders, it will automatically be applied to each image in Breeze. This is the file format used by Breeze to save measurements.
Scenario: Importing images without references
If your data is already converted to for example absorbance or reflectance you don't need to add any white or dark reference during the import. Just select your files when importing and finish the import wizard.