
A workflow consists of the data analysis steps in an Analysis Tree applied in sequence to hyperspectral data to produce output predictions. It can be seen as a data pipeline.
The workflow is used in Breeze when you click Apply Changes to perform data analysis on hyperspectral images in a project.
It can also be run in real-time in industrial applications where real-world actions can be triggered on data from the Breeze Runtime.
The Analysis Tree
On the Analysis Tree tab in Breeze, you add Descriptor nodes representing different analyses or properties of the data, and Segmentation nodes that are used to classify and mask regions in the images.
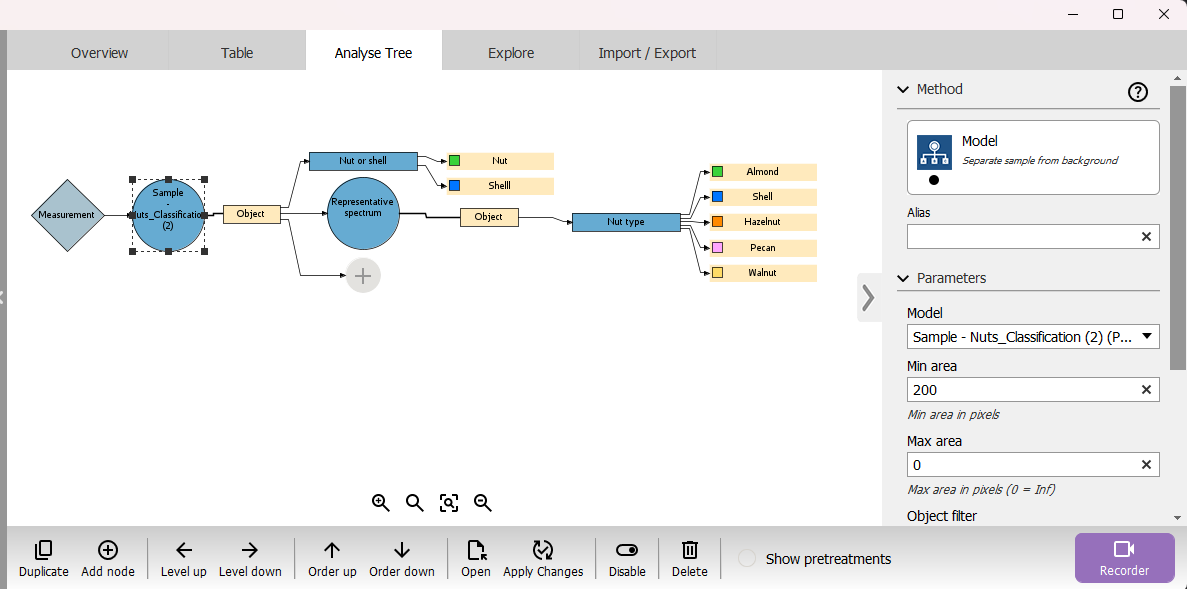
Each node has settings you can change in the right pane by selecting the node. The bottom toolbar has buttons to edit the nodes, and to apply it to the data in the project.
Data passes from left to right, starting at the measurement node, through the different levels of the tree, and top to bottom within the same level. The resulting output predictions are visualized in the Breeze Table described below, the other tabs in Breeze for measurements, and in Recorder guide when you record data as a live preview.
To learn how to work with the Analysis Tree, see Workflow descriptor guide.
Descriptors
Descriptors represent different analyses or ways to process data in the Analysis Tree. Output from descriptors are data for each pixel in the image.
Segmentations
Segmentations divide the image into multiple segments or regions. Output from segmentations are data for each pixel in the image, but also samples that have their own properties, such as size and position.
The samples can be large objects, for example when identifying nuts and shells as in the tutorials. Segmentation can also just mask out uninteresting parts of a larger image, like for example vegetation in an aerial image of minerals.
Learn more in the Segmentation guide.
The Table - and different segmentation levels
The table shows data for the measurements in scope (a single image, a group or the entire project) and any samples identified in each image by the segmentations.
The columns in the table are data, that can be numeric, or images with the pixel data for the samples.
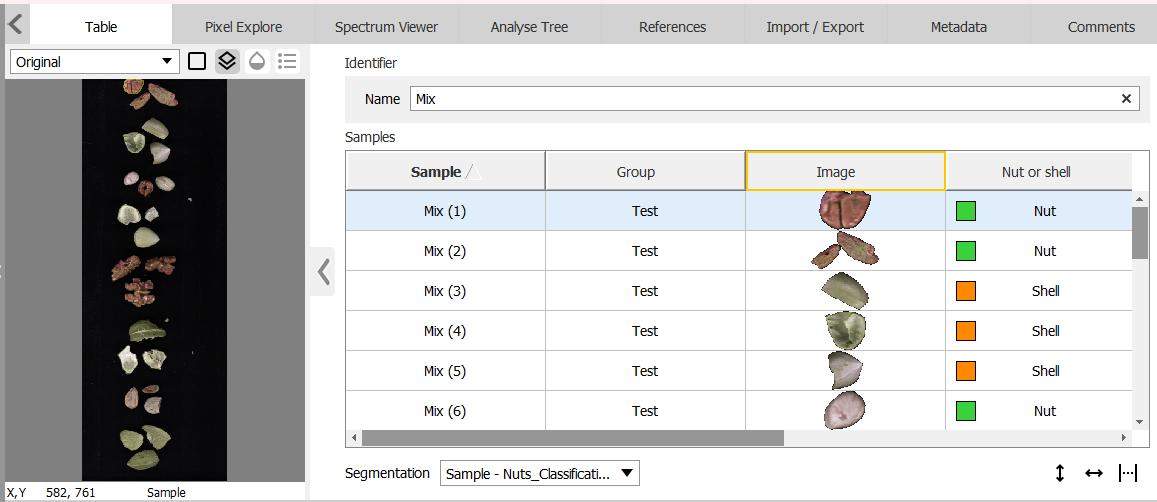
When you view images or data in the Table, you use the bottom toolbar to select the segmentation to view. Switch from viewing the original measurement to the different segmentation levels present in the Analysis tree.
The predictions are stored in measurement_prediction.raw files located next to the measurements on disk.
Interacting with the table and image
You can use the mouse to select samples in the table, and they will be highlighted in the image preview to the left. You can also select samples in the image, and they will be selected in the table.
Use standard multi-selection shortcuts by holding down the Shift or Ctrl key while selecting with the mouse:
-
Multi-select samples that are next to each other by Shift + click + drag
-
Multi-select individual samples by Ctrl + clicking
Applying a workflow to data
The Analysis Tree needs to be applied to an image measurement to create the output predictions.
To do this manually, click the Apply Changes button available in the bottom toolbar or right-click an image or a group and select Apply Changes in the context menu. You can apply changes to individual images, groups, or on all data in the project.

A progress bar is displayed when the workflow is applied. How long it takes, depends on the size of the workflow and data.
After the process is complete the updated data is available throughout Breeze.
When you use Breeze Recorder to create new images from a camera, the workflow is not applied in real-time. Starting with Breeze 2026.1, instead, you are prompted to apply the workflow when exiting Recorder. There is a settings that can controls this behavior as the Breeze Recorder page explains.
When you import new images, you have the option to apply the Analysis Tree or not. Importing data
Re-applying the workflow after making changes
When you make changes to the Analysis Tree settings, the models used in it or the images themselves, the changes are not automatically applied to existing data. Instead, images are annotated with an icon to show that there are changes that haven’t been applied yet.
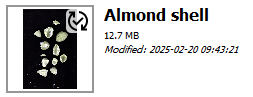
When you are ready to apply the changes, click the Apply Changes button.
Option to reduce memory consumption by saving object averages to disk
To apply the workflow to a measurement, Breeze traditionally has needed to keep the whole image in memory to be able to perform segmentations. This means that the amount of system memory of the PC places a limit on how large images you can analyze.
Starting with Breeze 2026.1 we have added an option to save object averages to disk instead of keeping everything in memory. This reduces memory consumption and enables analysis of larger images.
However, there are some limitations which are described next.
This option is not turned on by default.
Limitations
This option is not used in real-time data analysis. It is only used in Apply Changes, either triggered manually or by Recorder when recording a fixed length measurement.
Not all descriptors work with this option turned on. They are:
Automatic PCA (Stream) Descriptor
Enabling Disk-Mode automatically activates a new PCA (Stream) descriptor in the Analysis Tree.
-
This descriptor calculates PCA line-by-line to maintain low memory usage.
-
It delivers the exact same results as the standard PCA model, with a slight trade-off in processing speed.
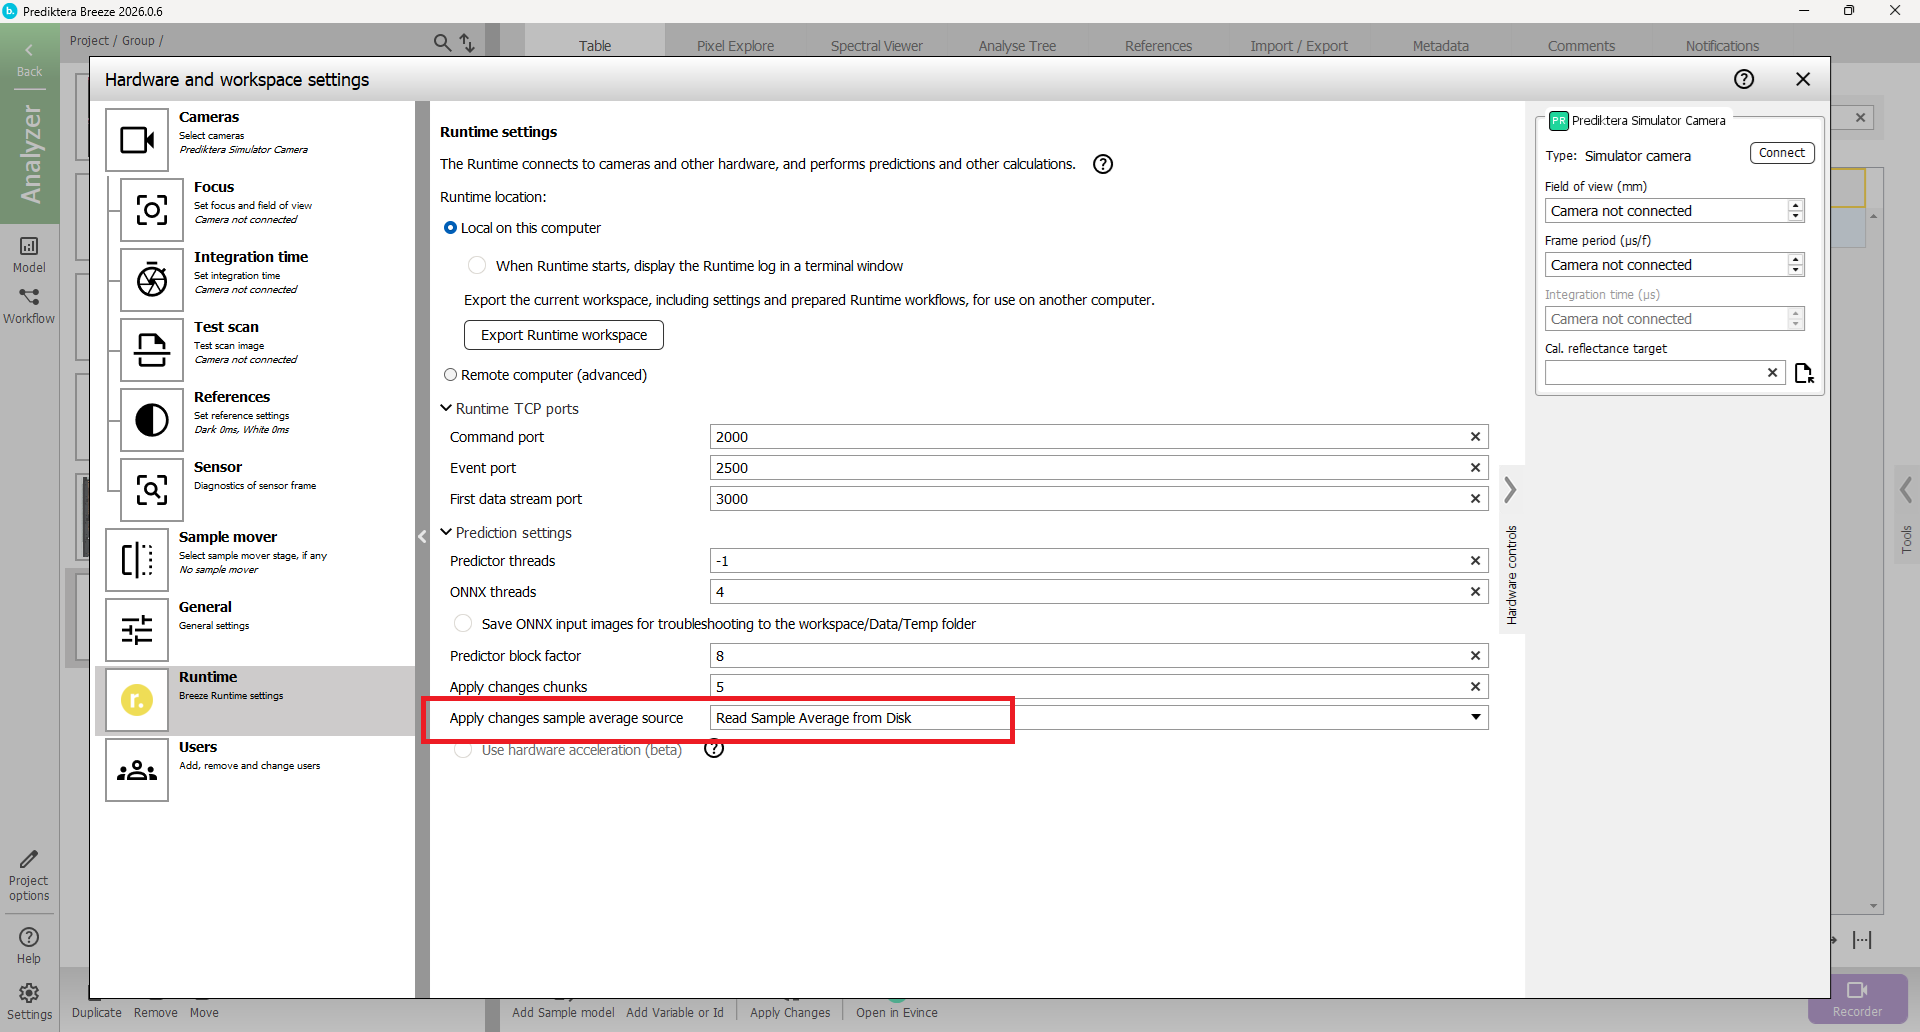
How to turn on in Settings
Find the option Read Sample Average from Disk and enable it in under Settings / Runtime:
How it works
Breeze processes hyperspectral data line-by-line to identify objects and calculate averages straight from the disk. This reduces memory (RAM) consumption, allowing you to process massive datasets. The trade-off is that processing is slightly slower due to disk read times.
Cached pixel predictions speed up applying changes
Starting in Breeze 2025.1, applying changes re-uses saved pixel-prediction data to speed up applying changes in the workflow to images in the project.
This works by Breeze keeping track of when the Analysis Tree is changed and when it last was reapplied to each image. If nothing has changed, pixel-predictions are not recomputed which saves time and resources.
Only when you make changes to Analysis Tree descriptors, models or the images themselves, will Breeze recompute the relevant prediction data.
Note that Breeze always recomputes sample segmentations when you click Apply Changes, and that this is not sped up by the cached predictions. The reason, is that samples are not saved to disk, but rather can be seen as a view into the measurement data, and as such it needs to be recomputed each time.
If you want to recompute everything, you can hold down Ctrl + Shift when clicking the Apply Changes button.
Real-time workflows
Workflows can also be run in real-time using the Continuous mode as described in Recorder guide, and from third party code in industrial applications. See Introduction to Breeze Runtime development.
There is also a topic about Runtime Performance diagnostics.
Optional Workflows
A project can have manually created Workflows. These are managed by clicking the Workflow button for an open project.
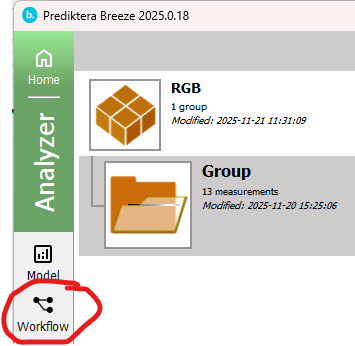
This opens the Workflow mode in Breeze where you can add one or more workflows.
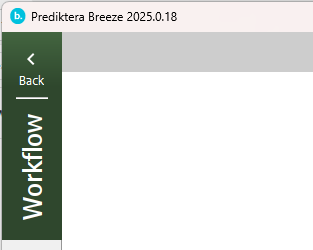
Each workflow starts out empty without any images, and with a snapshot of how the Analysis Tree looked like when the Workflow was created.
You can edit the Analysis Tree in the workflow without affecting the main project Analysis Tree, and record images that are stored separately from the main project.