The References tab for a measurement shows the dark and white references used for that measurement. The page also has functionality for replacing and editing the references.
Viewing references for a measurement
View the references of a measurement by navigating into a Group and then selecting a measurement.
The information about the black- and white references looks like this:
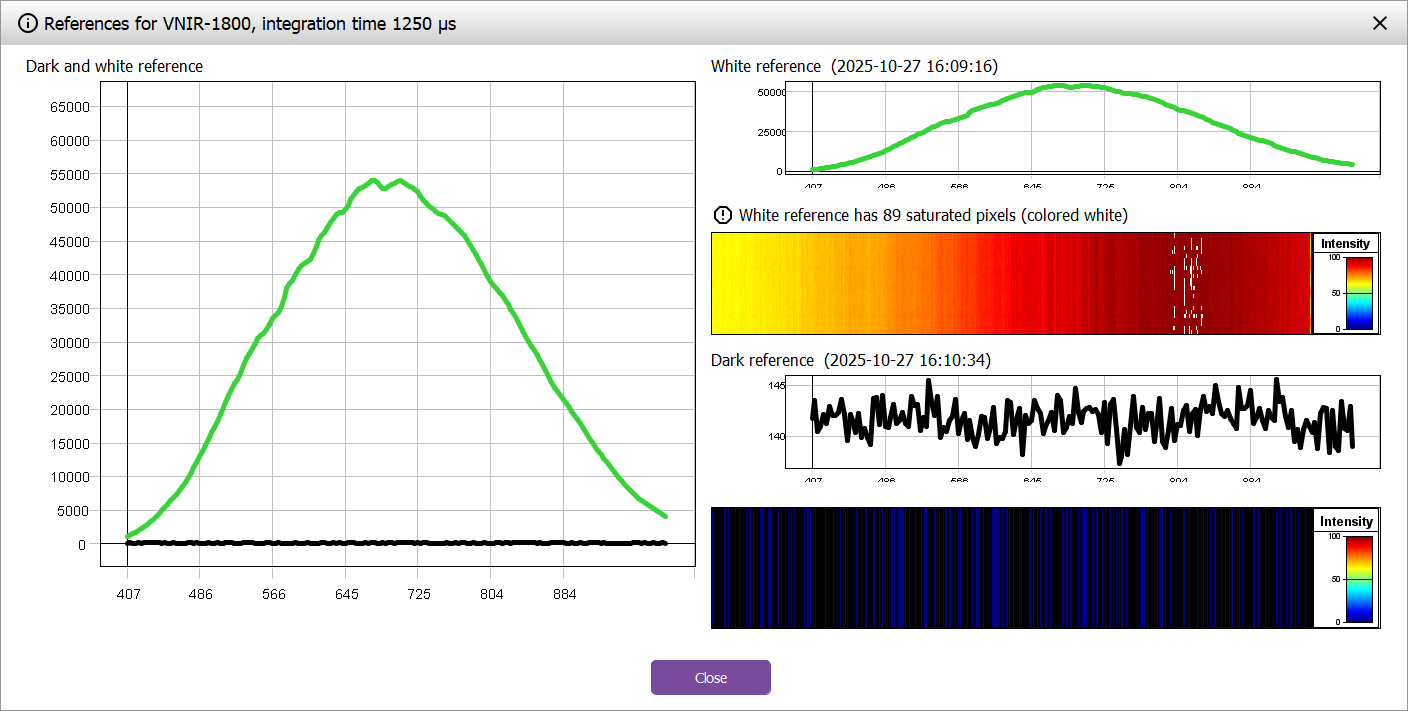
The plots show the average values for each wavelength for the white- and black reference.
Warnings for saturated pixels and other problems with the white reference are displayed above the visualization of the white reference. The number shows the number of pixels that are oversaturated in at least one wavelength band.
The references images display the actual white- and dark reference images, visualized as 2D saturation. The value and color of each pixel is the max saturation of any band in that pixel (values are normalized to go from 0 to 100). The color scale goes from blue to red, but zero pixels are black, and saturated pixels (100) are white.
Note that the dark reference displayed is the separately captured dark reference. It is not a dark reference specifically associated with the white reference image.
Some tips what to look for:
-
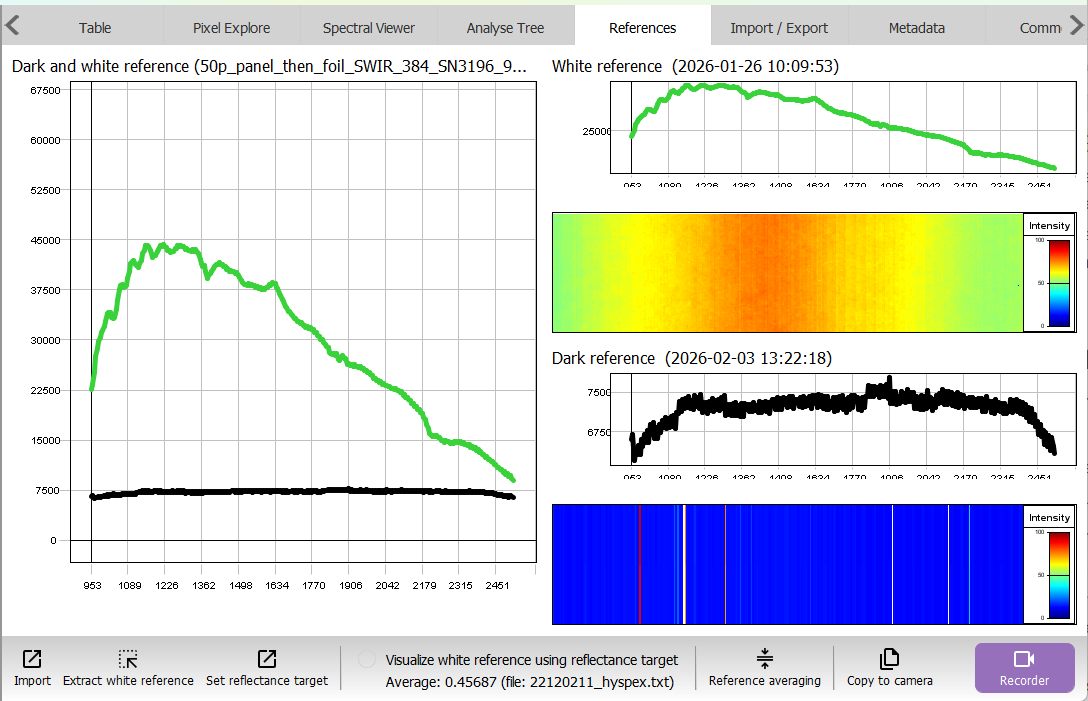
A white reference should be a uniform image the whole field of view. There should be no saturated pixels.
-
A black reference should be an essentially black image. Here it is expected that there are vertical bands, because each pixel in the sensor will result in the same data for all rows, since they are identical (shutter closed or lens manually covered).
Editing references
You can edit the references for measurements using the command buttons at the bottom of the page:
-
import new references to use for the measurement. Learn more in the next section.
-
extract a white reference from part of the measurement. A dialog is opened allowing you to zoom in and pan the image to find and select the part that is the reference.
-
specify a calibrated reflectance target to adjust for when the reference is gray instead of white. See the next section.
-
visualize the effect of the reflectance target, by rescaling the white reference in the left plot.
-
use reference averaging to reduce the storage space for the reference by storing averages. Reference averaging.
-
copy the reference to be the current reference used by the camera in Breeze
Importing, setting reflectance target and reference averaging works for many measurements at once if you multi-select measurements in the group before clicking the buttons.
Import references
Click the Import button at the bottom of the page to show the dialog for replacing the references used in the measurement:
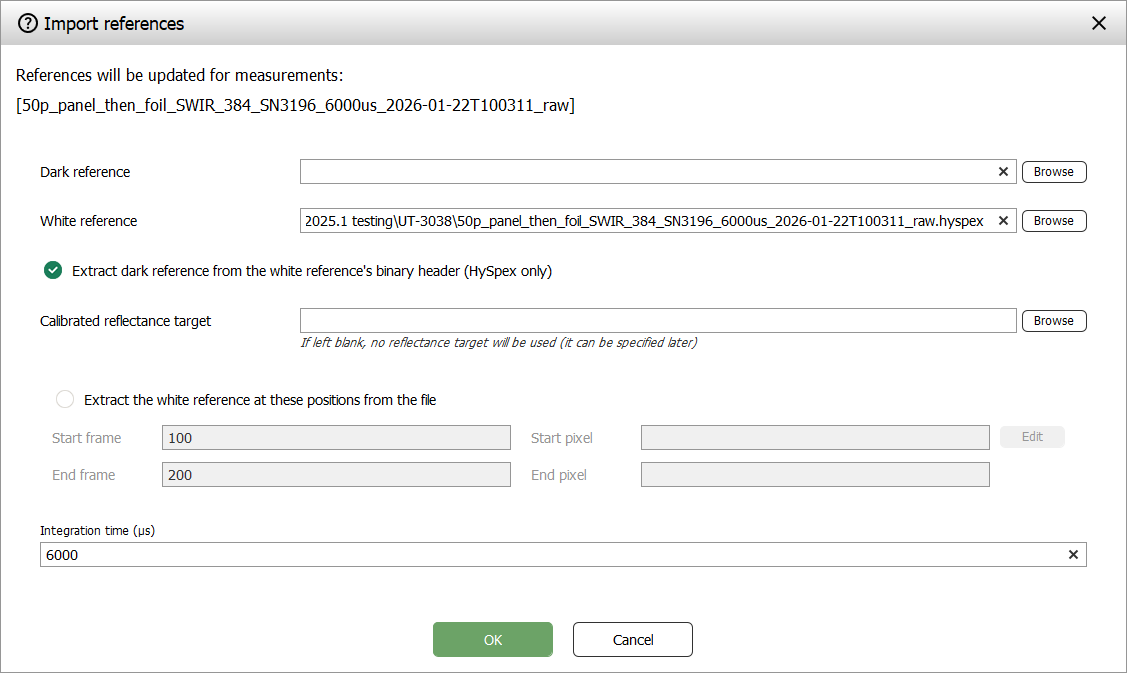
The top of the page lists the measurements you have selected before clicking Import.
Use the dialog to:
-
specify a dark reference file
-
specify a white reference file
-
If the selected white reference file is a HySpex file, you have the option to extract the dark reference from the binary header as seen in the screenshot
-
-
a calibrated reflectance target file.
-
use a specified part of the white reference by specifying start and end positions to extract
-
specify integration time
Learn more about these concepts in Dark and White References.